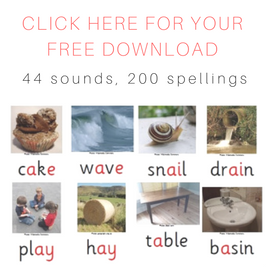
Moveable alphabet and affixes
$AUD15.00
The 2023 Spelfabet moveable alphabet has 140 single-sided tiles and 56 double-sided tiles, representing 118 graphemes, 22 prefixes and 50 suffixes. Download, colour print and assemble it using a laminator, magnetic tape, scissors and glue, and store/use it on a magnetic whiteboard. All tiles are one size, so it also fits neatly in a toolbox. There are spare high-use tiles.
Use it to build and change words e.g. make ‘hat’, change it to ‘hot’, then ‘not’ then ‘nut’ etc, then move onto longer words like ‘spit-split-slit-sling-sting’, following your phonics teaching sequence.
This set is also designed for early, low-verbiage morphology teaching e.g. make ‘hit’ then add suffix -ing or -er to get ‘hitting’ or ‘hitter’. Flip the ‘t’ tile over to get ‘tt’ before adding the suffix. Flip letter ‘y’ to ‘i’ when e.g. changing ‘happy’ to ‘happier’ or ‘happiness’. Build multiple related words like ‘heave-heaved-heaving-heavy-heavier-heaviest’, showing how sometimes sounds change but spellings stay the same.
Description
 The 2023 Spelfabet moveable alphabet and affixes (alphixes?) set has 140 single-sided tiles and 56 double-sided tiles, representing:
- 11 consonant spellings used before vowels, like ‘j’, ‘h’, ‘v’, ‘wh’ and ‘kn’ (these are green, like a traffic light’s ‘go’ signal),
- 48 vowel spellings like ‘u’, ‘ai’, ‘ea’, ‘oo’, ‘ur’, ‘igh’ and ‘ough’ (orange, meaning ‘caution’, because vowels are the trickiest part of English spelling).
- 36 consonant spellings used after vowels like ‘ck’, ‘ng’, ‘ff’, ‘ve’, ‘tch’, ‘ce’ and ‘mb’ (red, for stop and blend).
- 23 consonant spellings which are used both before and after vowels, like ‘k’, ‘m’, ‘s’, ‘sh’ and ‘ph’ (yellow).
- 22 prefixes (purple).
- 50 suffixes (blue).
All tiles are now the same size, making them easier to cut up and store/carry in a toolbox. There are two or three copies of high-use tiles, so you shouldn’t run out of letters like ‘e’ or ‘n’ when building long words (spares not shown in photos above and below). Double-sided tiles make the set compact, and help establish the concept that speech sounds/affixes are often written more than one way. The photo below shows the ‘flip’ side (as the vinyl buffs say) of double-sided tiles.

Early, low-verbiage morphology teaching
These tiles allow you to show children how to add prefixes and suffixes to base words without using complex ‘if-then’, ‘except-if’ type language, which young and language-disordered children find hard to understand.
For example, build the word sun, then add:
- suffix -s, to make suns, as in ‘the lizard suns itself on a rock’ (3rd person verb) or ‘many stars are suns’ (plural).
- suffix -‘s, to make sun’s, as in ‘the sun’s rays are bright today’ (possessive).
- suffix -ed, to make sunned, as in ‘the snake sunned itself on that rock yesterday’ (past tense) or ‘He had sunned himself for years, so his skin was leathery’ (past participle). Tell children that ‘suned’ is pronounced to rhyme with ‘pruned’, so when a vowel suffix is added, we flip the ‘n’ over to get ‘nn’, and keep the /u/ sound in ‘sun’.
- suffix -ing, to make sunning, as in ‘sunning yourself feels nice, but don’t get burnt’ (present participle). Again, flip the ‘n’ tile over to get ‘nn’.
- suffix -y, to make sunny, as in ‘It’s a lovely, sunny day’ (again, flip the ‘n’).
Some kids get a real six-words-for-the-price-of-one buzz from this. They start wanting to try other prefixes and suffixes, to see what other words they can make.
This alphabet also makes it easy to teach the concept that spellings can stay the same when sounds change during word-building e.g.
- Build the word heave, with vowel sound /ee/, then add suffix -y to get heavy, with vowel sound /e/.
- Build the word south and notice that the vowel sound changes, but the spelling stays the same, when we add suffix -ern to make southern.
- Build words like act, music and discuss, and notice how their last sounds change when we add suffix -ion to get action, musician and discussion. Preserving base word spellings helps us know what the new word means.
This set of tiles doesn’t include the six ‘split vowel’ spellings in previous moveable alphabets: a…e as in ‘make’, e…e as in ‘these’, i…e as in ‘like’, o…e as in ‘hope’, u…e as in ‘cute/flute’ and y…e as in ‘type’. Their unusual shape was a bit distracting and fiddly, and their different logic added cognitive load.
The original sets already had several word-final consonant-e spellings: ce as in voice, ge as in large, le as in bottle, se as in house/please, ve as in give, ze as in breeze. Replacing the ‘split’ spellings with extra consonant-e spellings (be, de, fe, ke, me, ne, pe, re and te) only adds three extra graphemes, follows the same left-to-right logic of the rest of the set, and makes it easier to build common words like ‘come/some’ and ‘done/gone’. These reasons plus ease of making/handling/storing tiles have motivated this change. If you prefer ‘split’ spellings, please listen to Episode 11 of the Sounds-Write podcast. You might also be persuaded.
If you already have a serviceable Spelfabet or other moveable alphabet, you can add the new bits of this one to it, keeping the file on your computer so you can print, assemble and use it in full once your existing set finally bites the dust.
How to make the set
Download the pdf file of letter/affix tiles, and save it to your computer.
You need:
- Colour A4 printer and white A4 paper, preferably a laser printer/copier (stationery shops have them, print the file from a USB stick there).
- Laminator and nine A4 laminating pouches. Use thicker (e.g. 125 micron) pouches if you want a more robust result.
- About 12 metres of heavy duty magnetic tape at least ~13mm wide. If using wider tape e.g. 25cm wide, you won’t need quite so much. Use the kind of tape you get from a hardware store (sometimes called ‘self-adhesive magnetic strip’), not flimsy magnetic tape in a plastic dispenser from craft or stationery stores. The thicker, stronger tape makes the tiles chunky and easy to manipulate, and makes them grip your whiteboard well.
- Sharp scissors.
- Strong glue (e.g. Tarzan’s grip, super glue).
- A good podcast and some time (sorry. Highly recommended: Sold A Story from APM reports by Emily Hanford).
Assembly:
- Colour print the nine pages of letter tiles on A4 paper, single sided.
- Laminate the pages.
- Cut the first five pages up. Stick a strip of magnetic tape on the back of each piece.
- Cut the remaining four pages into eight horizontal strips, and then cut each strip vertically.
- Cut the laminated pieces horizontally into single tiles, and place them back-to-back on the table as though they’ve been folded instead of cut (if you flip them over vertically, the letters should be facing up).
- Cut strips of magnet a little shorter than the height of each alphabet piece. Stick pairs of magnetic strips together, magnetic side out.
- Make ‘magnet sandwich’ double-sided tiles by gluing two pieces of magnet, magnetic side out, inside each pair of letter tiles, printed side out.
- Leave to dry overnight.
Related products


 The Spelfabet shop has affordable, downloadable spelling teaching resources.